6.0 SCHEDULING
6.1 SEQUENCE OF EVENTS
Most conventional building projects follow a similar sequence of events.
Differences occur in the type of construction, such as cavity brick, brick veneer, timber or steel frame with cladding.
Of course, unconventional types of construction such as straw, earth etc. present considerable scheduling differences.
In effect, if you adhere to our sample building schedule as contained herein, you will understand what comes next.
Notwithstanding, following is a chronological list for ease of reference –
1. Arrange services
2. Arrange contractors
3. Order materials
4. Clear and prepare site
5. Set out – surveyor
6. Temporary power
7. Water supply
8. Excavate for footings/stumps
9. Drainage under slab
10. Steel in footings/stumps
11. Inspection – steel/foundations
12. Concrete – pour footings
13. Brickwork – base course
14. Concrete – form and prepare
15. Membrane and steel/slab
16. Inspection
17. Pest Barriers
18. Concrete – pour slab
19. Carpenter – bearers/joists (if applicable)
20. Carpenter – floor sheeting (if applicable)
21. Pest barriers
22. Carpenter – wall frames
23. Carpenter – trusses/tie downs
24. Carpenter – Windows
25. Frame inspection
26. Plumber – roof, gutters/valleys
27. Plumber – hot and cold water rough in
28. Electrical – pre wire
29. Other services
30. Carpenter – frame wrap
31. Bricklayer – walls
32. Soffit linings
33. External drainage
34. Drainage inspection
35. Internal linings
36. Carpenter – joinery
37. Painter – first coat seal
38. Carpenter – fix out/ kitchen
39. Painter
40. Water proofing
41. Floor and wall tiler
42. Plumber – fix out
43. Electrician – fix out including (light fittings if available)
44. External pest barriers
45. Clean up – prepare site
46. Final inspection
Following on from the owner builder construction schedule which details the order of the project and the trades and services to be used, it is helpful for the Owner-Builder to have a basic knowledge of the function of each contractor employed on their site.
Note:
Remember, not any two projects will be the same, nor will environmental or other factors be always constant throughout two similar projects.
The following is provided as a guide and refers to a simple, typical construction using established building principles and systems.
Each project will be different and it will be your ability to recognise and adapt to these variations that will affect the outcome of your works.
The list of all construction techniques employed throughout the building and construction industry are wide ranging and varied and it would be impossible to cover all of them in the scope of this course.
In earlier sections we looked at the roles and duties or services provided by professionals such as architects, engineers and surveyors, we will now look at a basic job description of each of the trades.
We will amplify some of the trades in the sequence for clarity and to assist in developing a realistic construction schedule.
Organise and hire site toilet facilities and construction fencing as required.
This is a good time to talk to council about installation of the footpath or kerb crossings as necessary.
Remember, during the tendering process you should have received and considered at least three quotations for each trade or service.
Your nominated contractor list should include:
The above list however is fairly representative of a standard contractor list used in the construction of a domestic dwelling.
As we discussed earlier, these tradespeople and suppliers will not be sitting around waiting for your call, so coordinate carefully with all your contractors and suppliers to give your project every chance of being completed on time and on budget.
Allow contingencies for wet weather and other unforeseen circumstances and build some flexibility into the program if at all possible.
Remember when things don’t go exactly as planned, it is time to take stock, sit back re evaluate and reschedule as required.
Differences occur in the type of construction, such as cavity brick, brick veneer, timber or steel frame with cladding.
Of course, unconventional types of construction such as straw, earth etc. present considerable scheduling differences.
In effect, if you adhere to our sample building schedule as contained herein, you will understand what comes next.
Notwithstanding, following is a chronological list for ease of reference –
1. Arrange services
2. Arrange contractors
3. Order materials
4. Clear and prepare site
5. Set out – surveyor
6. Temporary power
7. Water supply
8. Excavate for footings/stumps
9. Drainage under slab
10. Steel in footings/stumps
11. Inspection – steel/foundations
12. Concrete – pour footings
13. Brickwork – base course
14. Concrete – form and prepare
15. Membrane and steel/slab
16. Inspection
17. Pest Barriers
18. Concrete – pour slab
19. Carpenter – bearers/joists (if applicable)
20. Carpenter – floor sheeting (if applicable)
21. Pest barriers
22. Carpenter – wall frames
23. Carpenter – trusses/tie downs
24. Carpenter – Windows
25. Frame inspection
26. Plumber – roof, gutters/valleys
27. Plumber – hot and cold water rough in
28. Electrical – pre wire
29. Other services
30. Carpenter – frame wrap
31. Bricklayer – walls
32. Soffit linings
33. External drainage
34. Drainage inspection
35. Internal linings
36. Carpenter – joinery
37. Painter – first coat seal
38. Carpenter – fix out/ kitchen
39. Painter
40. Water proofing
41. Floor and wall tiler
42. Plumber – fix out
43. Electrician – fix out including (light fittings if available)
44. External pest barriers
45. Clean up – prepare site
46. Final inspection
Following on from the owner builder construction schedule which details the order of the project and the trades and services to be used, it is helpful for the Owner-Builder to have a basic knowledge of the function of each contractor employed on their site.
Note:
Remember, not any two projects will be the same, nor will environmental or other factors be always constant throughout two similar projects.
The following is provided as a guide and refers to a simple, typical construction using established building principles and systems.
Each project will be different and it will be your ability to recognise and adapt to these variations that will affect the outcome of your works.
The list of all construction techniques employed throughout the building and construction industry are wide ranging and varied and it would be impossible to cover all of them in the scope of this course.
In earlier sections we looked at the roles and duties or services provided by professionals such as architects, engineers and surveyors, we will now look at a basic job description of each of the trades.
We will amplify some of the trades in the sequence for clarity and to assist in developing a realistic construction schedule.
- Arrange Services
Organise and hire site toilet facilities and construction fencing as required.
This is a good time to talk to council about installation of the footpath or kerb crossings as necessary.
- Arrange Sub Contractors
Remember, during the tendering process you should have received and considered at least three quotations for each trade or service.
Your nominated contractor list should include:
- Excavator
- Electrician
- Plumber and Drainer
- Gasfitter
- Concretor
- Carpenter
- Bricklayer
- Waterproofer
- Plasterer (internal linings)
- Roofer
- Floor and Wall Tiler
- Floor Sander
- Painter
- Landscaper
The above list however is fairly representative of a standard contractor list used in the construction of a domestic dwelling.
As we discussed earlier, these tradespeople and suppliers will not be sitting around waiting for your call, so coordinate carefully with all your contractors and suppliers to give your project every chance of being completed on time and on budget.
Allow contingencies for wet weather and other unforeseen circumstances and build some flexibility into the program if at all possible.
Remember when things don’t go exactly as planned, it is time to take stock, sit back re evaluate and reschedule as required.
Working from you schedule, coordinate with the suppliers to make certain that PC’s are in stock, hardware and other site consumables are delivered at the right time to minimise delays. Some of the materials and hardware you will need to consider for delivery or availability on site are: |
- Sand, Gravel and Fill
- Bricks
- General Hardware
- Concrete
- Timber
- Roofing
- Windows and Doors
- Tilt and or Roller Shutters and Doors
- Internal Linings
- Kitchen
- Wall Finishes
- Light Fittings
- All PC items
Having all the materials on site too early though can cause some problems.
- Where do you store them so they are safe from theft and not in the way of people working on your site?
- Are they causing trip points or hazards to people engaged on the site?
- What effect will it have on the cash flow of the project to pre buy everything and have them sit on site awaiting installation?
- Clear and Establish Site
|
Using the information provided during the site survey and the established levels, coordinate and instruct the excavator to prepare the site for construction works to commence. Consider what machinery you will need to carry out the excavations and how they will access the site. |
- Site Set Out
This function is most often performed by the builder themselves, so as the Owner-Builder it may be necessary to engage the services of the surveyor to assist in this set out.
Getting this important step right first time will save you money and prevent possible litigation or the withholding of approvals if the structure is not sited as per the approved plans.
- Under Floor Services
Particularly for slab on ground construction, it is important to coordinate the services which are to be installed under slab.
These may include:
- Water reticulation (hot and cold water)
- Electrical services
- Sub floor heating elements
- Vacuum systems
- Drainage – Sewer and Stormwater
Lagging as necessary is to be installed at this point for both insulation requirements and for all slab penetrations.
- Footings
|
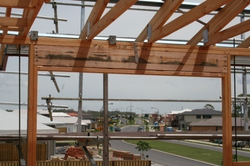
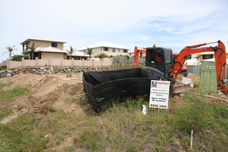
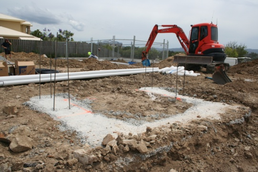
The soil or geotechnical engineer will have in consultation with the structural engineer and reference to the completed drawings designed the footing system for the dwelling.
Concrete footings and slab design need to be in accordance with AS 2870 and an inspection of the reinforcing steel and trenches will be required before the pour. Where footings are to be excavated, this is normally done by a backhoe. |
Depending on soil type and subsoil stratas, specialist equipment such as rock breakers etc may need to be used.
Plan these works carefully and consider the most effective and economical system to suit the ground conditions.
Where trenches, pits, bore or pile holes are dug, ensure they are not left open for any longer than is necessary.
Not only do they present a risk to visitors to the site but also pose a health risk if allowed to fill with water and let sit stagnate.
Water intrusion and edge subsidence or damage will also generally make the footings bigger than they need be, this can result in the use of additional concrete not really required and increases the cost substantially.
The steel fixer or concrete contractor will fix the reinforcing steel as per the approved design.
As required, the bricklayer can now set out and lay the foundation or sub floor walls, any piers or retaining walls.
Concrete footings should be allowed to cure for a minimum of seven days to reach optimum strength.
Remember that a minimum clearance of 230mm is required from the lowest sub floor member to finished ground level for all suspended floor structures.
These days many methods of termite treatment are available and it is important that you investigate all the possibilities to determine the most suitable protection for your dwelling.
Termite protection is covered under AS 3660.1
Check with your local authority and make sure you are fully informed of their requirements in respect to termite treatment and use only reputable, qualified and appropriately licensed companies to carry out these works.
Primarily there are two types of termite barriers in use today:
1) Physical, such as termimesh, ant caps, granite guards etc
2) Chemical, including perimeter protection and replenishable reticulating chemical system which are proving extremely popular with new home builders.
Make sure you are familiar with the maintenance required to ensure the continue integrity of whichever system of protection you install.
A “termite brochure” is available from your local Fair Trading Centre and can be provided upon request.
Before the slab can be poured, it is usual to have to form up or box unsupported areas or edges of the slab.
In most cases these works are completed by the concretor.
Make sure the concreter is aware of and allows for any setdowns in the slab including, changes of level, shower compartments, weatherproofing at garage entry etc.
Plan these works carefully and consider the most effective and economical system to suit the ground conditions.
Where trenches, pits, bore or pile holes are dug, ensure they are not left open for any longer than is necessary.
Not only do they present a risk to visitors to the site but also pose a health risk if allowed to fill with water and let sit stagnate.
Water intrusion and edge subsidence or damage will also generally make the footings bigger than they need be, this can result in the use of additional concrete not really required and increases the cost substantially.
The steel fixer or concrete contractor will fix the reinforcing steel as per the approved design.
- Brick Base and Foundation or Retaining Walls
As required, the bricklayer can now set out and lay the foundation or sub floor walls, any piers or retaining walls.
Concrete footings should be allowed to cure for a minimum of seven days to reach optimum strength.
Remember that a minimum clearance of 230mm is required from the lowest sub floor member to finished ground level for all suspended floor structures.
- Termite Treatment
These days many methods of termite treatment are available and it is important that you investigate all the possibilities to determine the most suitable protection for your dwelling.
Termite protection is covered under AS 3660.1
Check with your local authority and make sure you are fully informed of their requirements in respect to termite treatment and use only reputable, qualified and appropriately licensed companies to carry out these works.
Primarily there are two types of termite barriers in use today:
1) Physical, such as termimesh, ant caps, granite guards etc
2) Chemical, including perimeter protection and replenishable reticulating chemical system which are proving extremely popular with new home builders.
Make sure you are familiar with the maintenance required to ensure the continue integrity of whichever system of protection you install.
A “termite brochure” is available from your local Fair Trading Centre and can be provided upon request.
- Formwork or Boxing
Before the slab can be poured, it is usual to have to form up or box unsupported areas or edges of the slab.
In most cases these works are completed by the concretor.
Make sure the concreter is aware of and allows for any setdowns in the slab including, changes of level, shower compartments, weatherproofing at garage entry etc.
- Concrete Slab
|
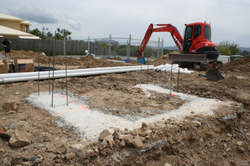
Fabric reinforcing mesh can now be installed, usually over a waterproof membrane or vapour barrier, (builder plastic).
Joints in the membrane will be lapped and taped (min. 200mm) and the mesh stood on chairs to achieve the required top and bottom covers. Where necessary, control, expansion or articulation joints will be installed as per the design and the slab will be poured and finished as specified. |
These works are all generally completed by the concreter.
Any penetrations through the slab must be sealed and or lagged.
After the slab is pour, coordinate and consult with the concreter on the stripping of formwork or boxing and seek advice on the best method to cure the slab.
Allowing the slab to dry to quickly will result in cracking to the surface and at worst, affect the structural strength achieved.
If a timber floor system is used, the carpenter will set out the bearers on the piers and foundation walls.
The joist are then laid and the timber floor membrane is affixed to the sub floor members.
The floor membrane could be either planked, boards, sheet or a combination of these systems.
The carpenter must ensure that all joints are fast and that the bearers fit tight to the piers.
Any problems not noticed and rectified at this point will result in annoying noises and squeaks and possible failure or subsidence of the flooring system.
Any penetrations through the slab must be sealed and or lagged.
After the slab is pour, coordinate and consult with the concreter on the stripping of formwork or boxing and seek advice on the best method to cure the slab.
Allowing the slab to dry to quickly will result in cracking to the surface and at worst, affect the structural strength achieved.
- Floor Framing
If a timber floor system is used, the carpenter will set out the bearers on the piers and foundation walls.
The joist are then laid and the timber floor membrane is affixed to the sub floor members.
The floor membrane could be either planked, boards, sheet or a combination of these systems.
The carpenter must ensure that all joints are fast and that the bearers fit tight to the piers.
Any problems not noticed and rectified at this point will result in annoying noises and squeaks and possible failure or subsidence of the flooring system.
- Wall Frame
|
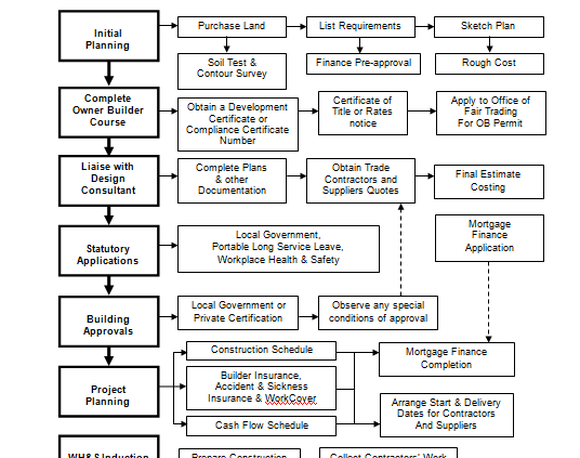
Your carpenter will now generally stand the wall frames and associated bracing and tie downs as required by the design.
It is most common for prefabricated wall frames to be utilised and this requires accurate drawings and specifications to ensure they go together with a minimum of fuss. Wall frames are to be constructed, installed, braced and tied down in accordance with AS 1684. |
This allows for general construction types as used on most residential dwellings, any unique, extraordinary or structurally demanding design will require design and certification from a structural engineer.
Noggings and fixing points for fixtures such as cisterns and tapsets should now be installed in accordance with the approved plans.
Depending on the design, most standard construction for domestic dwellings these days utilise pre fabricated, gang nailed roof trusses to support the tiles or sheet metal roof covering.
Noggings and fixing points for fixtures such as cisterns and tapsets should now be installed in accordance with the approved plans.
- Roof Trusses
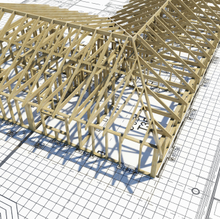
Depending on the design, most standard construction for domestic dwellings these days utilise pre fabricated, gang nailed roof trusses to support the tiles or sheet metal roof covering.
|
The carpenter generally erects these after the wall framing and bracing are in place.
They are installed in accordance with the suppliers details and will include the use of triple grips, speed brace etc to ensure adequate bracing and hold down.
At this point it is normal for the carpenter to go through and fit out the all external opening in respect the door jambs, windows complete with reveals etc. |
Flashings should be secured and check form correct installation at this point.
It is advisable to go through and check that all doors and windows are plumb and true.
Roof drainage including valleys, box gutters and flashings should now be fixed by the roof plumber.
In most cases now the roof plumbing is carried out by a separate contractor and the used of preformed extruded gutters and fascias are commonplace.
It is important to ensure all gutters are provided with adequate fall, downpipes are appropriately spaced and that in long straight runs the required expansion joints are incorporated into the design.
The roofer can now affix the tiles or roof sheet as specified.
Sarking should be used as it greatly enhances the waterproofing of the roofing system, assists in insulation and helps to prevent dust entering the finished dwelling.
Fixing systems for both tiles and roof sheets will depend on the category of the site and the associated design wind loading.
It is advisable to go through and check that all doors and windows are plumb and true.
- Roof Drainage, Guttering and Fascia.
Roof drainage including valleys, box gutters and flashings should now be fixed by the roof plumber.
In most cases now the roof plumbing is carried out by a separate contractor and the used of preformed extruded gutters and fascias are commonplace.
It is important to ensure all gutters are provided with adequate fall, downpipes are appropriately spaced and that in long straight runs the required expansion joints are incorporated into the design.
- Roofer
The roofer can now affix the tiles or roof sheet as specified.
Sarking should be used as it greatly enhances the waterproofing of the roofing system, assists in insulation and helps to prevent dust entering the finished dwelling.
Fixing systems for both tiles and roof sheets will depend on the category of the site and the associated design wind loading.
- Plumber
|
The plumber can now complete the rough in, that is install the hot and cold water piping throughout the house.
It is important that pipes are adequately supported and fixed with pipe saddles or clips to minimise the event of ‘waterhammer’ Where pipes pass through stud walls they should be insulated with an appropriate sarking and if possible made fast with a silicon sealant or in the case of steel framed construction a rubber grommet. Saddles and clips should be of a non ferrous type to prevent a reaction which may lead to rapid corrosion of the installation. |
If gas is to be installed, then any in wall pipework should be completed at this time.
Remember that all pipework requires pressure testing and inspection prior to be concealed by the wall linings.
If the plumber is completing the drainage, then external and or underground works including sewer and stormwater pipework should now be completed.
As for the plumber above, the electrician can now complete the rough in of the wiring.
Remember that all pipework requires pressure testing and inspection prior to be concealed by the wall linings.
If the plumber is completing the drainage, then external and or underground works including sewer and stormwater pipework should now be completed.
- Electrician
As for the plumber above, the electrician can now complete the rough in of the wiring.
- External Cladding
The bricklayer can now complete the face brickwork to the external walls and in the case of sheeted surfaces or plank clad walls, the carpenter can fix the external cladding.
Ensure that previously fix flashings are pulled through or finished correctly to provide the waterproofing adequately.
The carpenter can fit the soffit linings at this point.
- Wet Area Flashing
|
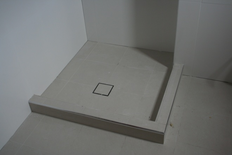
A specialist waterproofer should be engaged to install the flashings and membranes to all wet areas as required. Make certain that all works are carried out in accordance with the manufacturers specifications and recommendations for application and that a certificate verifying the systems rating is issued by the contractor along with the required warranty details. |
Having been a involved with building inspections and defect report writing on residential building for many years, we can state that the failure of the waterproofing systems particularly in the shower area would be the most common defect found.
Notwithstanding the above, the systems now used are far superior to previous applications, and a well installed membrane will these days provide a substantial life.
Be aware of the different types of application used for sheet floors as opposed to concrete slabs and ensure the correct system is used.
Wall insulation such as batts etc can now be fitted.
Once all the in wall or ‘hidden’ services are completed, tested and inspected as required, the walls can be lined.
Ensure all wet areas are inspected and certified as required and that the wall and floor tiler has completed the required flashings if any.
Check wall cavities for cleanliness and that vermin protection and wall ties are free of any excess mortar.
The wall sheet, cornices and mouldings should now be fixed in accordance with the manufacturers recommendations.
Notwithstanding the above, the systems now used are far superior to previous applications, and a well installed membrane will these days provide a substantial life.
Be aware of the different types of application used for sheet floors as opposed to concrete slabs and ensure the correct system is used.
- Wall Insulation
Wall insulation such as batts etc can now be fitted.
- Internal Linings
Once all the in wall or ‘hidden’ services are completed, tested and inspected as required, the walls can be lined.
Ensure all wet areas are inspected and certified as required and that the wall and floor tiler has completed the required flashings if any.
Check wall cavities for cleanliness and that vermin protection and wall ties are free of any excess mortar.
The wall sheet, cornices and mouldings should now be fixed in accordance with the manufacturers recommendations.
- Joinery and Fix Out
- Floor and Wall Tiling
Your tiler can now come and lay floor and wall tiles to al areas as required.
Grouting should be left for at least 24 hours after the tiles are laid and large areas of tiled flooring should include the use of a control or expansion joint to minimise the possibility of movement cracking.
The most common place for this cracking to occur is at internal or re-entrant corners.
Make certain all sheet flooring which will have a tile finish is correctly secured and sealed to avoid problems with movement.
- Painter
Utilising the paint system as specified and selected, the painting contractor can now apply sealers, primers, undercoats and or finish coats as required.
Painting contractors should go through and make good any ‘popped’ or exposed nails, imperfections in mitred joints etc prior to commencing the application of the product.
If any imperfections are noted which are unacceptable or not within the capability of the painter to rectify, the responsible tradesperson should be recalled.
The plumber and the electrician can now return and complete the fit out of fixtures, fittings and PC items, this may include:
Now is the time to consider the following:
1. Telephone, final connection of service
2. Ceiling insulation, install as required
3. Landscaping, this may include plantings, pathways, vehicular drives. water features etc.
Before moving in complete the installation of fly screens, shower screens, security doors, garage openers, gates, fences etc and ensure the site is clean and free of all debris from the construction process.
The above list whilst not exhaustive gives a general guide to the sequencing of works on a ‘standard’ domestic dwelling using traditional building systems and or methods.
Special design features or difficult sites may require the use of trades other than those detailed above such as structural steel and or sail shades etc.
If any imperfections are noted which are unacceptable or not within the capability of the painter to rectify, the responsible tradesperson should be recalled.
- Plumbing and Electrical Fitout
The plumber and the electrician can now return and complete the fit out of fixtures, fittings and PC items, this may include:
- Range Hood
- Range
- Hotplates
- Wall Oven
- Light Fittings
- Toilet Suites
- Basins
- Taps
- Laundry Tub
- Kitchen Sink
- Ancillary Services
Now is the time to consider the following:
1. Telephone, final connection of service
2. Ceiling insulation, install as required
3. Landscaping, this may include plantings, pathways, vehicular drives. water features etc.
- Finish Up and Site Clean
Before moving in complete the installation of fly screens, shower screens, security doors, garage openers, gates, fences etc and ensure the site is clean and free of all debris from the construction process.
The above list whilst not exhaustive gives a general guide to the sequencing of works on a ‘standard’ domestic dwelling using traditional building systems and or methods.
Special design features or difficult sites may require the use of trades other than those detailed above such as structural steel and or sail shades etc.
6.2 CONSTRUCTION SCHEDULE
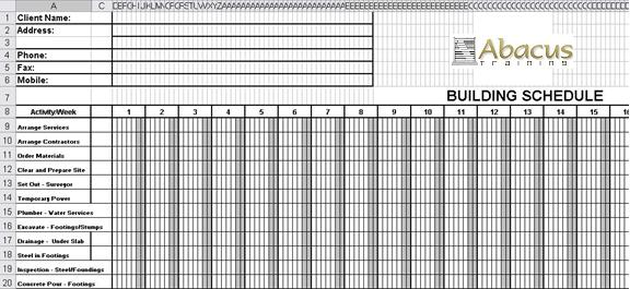
We have provided a building schedule spread sheet, the use of which should become clear once studied and considered in respect to your project.
Referring to the sample will help.
In our schedule you will see a 26 week programme.
Each week is divided into seven days, with the last two days shaded in. This, of course, indicates Saturday and Sunday.
We would suggest that you don’t schedule any works on those days. However, this is up to you and what you have planned.
Try to give yourself some free time, for example, if you pour concrete on Thursday don’t restart ‘till Monday. It gives you some flexibility.
Don’t dig your trenches on a Friday and leave them open all weekend. Reschedule to keep continuity and save yourself from a multitude of hassles.
Be aware of the possibility of collapsing trenches – children or others falling it – rain or flooding filling them.
When ordering windows, organize your delivery exactly when you need them to guard against theft, damage, water penetration, vandals, etc.
With inspections, plan them with a minimum of 48 hours notice. Most authorities will carry these out the next day, but ensure you check.
The plumber will need notice for installation of the bath and/or spa when the roof goes on. Check with both the plumber and electrician as to what their needs are.
Theft is rife in the building game. You can never be sure that your goods and materials will be safe. Once you start getting your prime cost items installed, you may want to think about sleeping on the job until lock-up stage.
Liaise with all your contractors as to when they will want to be on site. For example, the painter might well want one or two days between the carpentry/ joinery and the carpenter fix out in order to avoid masking of your finished items, kitchen benches, hot plates, etc.
The water proofing contractor and floor and wall tiler (if not the same contractor) might need some contact with each other.
Don’t run off and hire a power pole – the electrician might not want or need it.
If you are having a swimming pool, does it need to be excavated first?
Tips
Before commencing the building schedule try to estimate how long each trade will take to complete the works indicated on the schedule.
Check with your contractors before producing the schedule, that the times are realistic.
Blank out public holidays, RDO’s etc and complete you schedule.
6.3 SITE CO-ORDINATION
Organisation
On site coordination requires you to be disciplined and organised.
Using the file structure and the proforma provided in this manual will go a long way to helping you achieve this.
We have provided the structure, only you can provide the discipline.
With the schedule set, you will need to monitor and review the progress of the site on a daily basis if possible.
Keep a good record, a site diary is the best solution here, but it must be maintained religiously and accurately.
Did you know that during a conflict or dispute mediation or resolution process, a well maintained and detailed site diary is considered a legal document.
In addition, we strongly recommend scheduling site coordination meetings programmed on an as required basis.
These meetings become increasingly important when delays occur and it is necessary to reschedule.
In many instances, on smaller projects, this can be achieved through telephone calls, faxes or emails.
Just be certain you record all correspondence and agreements or undertakings for future reference.
It is your responsibility to ensure all Trade Contractors, service providers and suppliers fully understand where and when they will be required.
Telephone calls, reminding contractors or suppliers of their commitment, is essential in ensuring the project stays on track.
Where a delay is known to occur, give the contractor as much notice as possible to allow them to reschedule.
Supervision
If you are undertaking the supervision of the works yourself, the details included in the sample specifications and the section, “Known Problem Areas” will be of use when inspecting works for progress or final payment.
Refer to your contract and any variations to confirm works are completed and use the certifications or inspection checklist as required.
General Coordination
As the Owner Builder you are responsible for the site and all the works conducted therein, this may include but is not limited to:
- Setting out the project
- Providing storage facilities and temporary services
- Paying Trade Contractors
- Satisfying compliance inspections (plumbing, footings, bracing, final
- Ordering and arranging delivery of materials and plant
- Maintaining site cleanliness and safety
- Managing delays and dispute
6.4 DELAYS RECORD
The delays you encounter on your site need to be recorded.
The main reason for this is the required modification of the Construction Schedule.
Additionally, the recording of delays may be useful in identifying specific trends with suppliers or contractors and may be used as supporting materials during dispute resolution.
We recommend entering the data into the site diary.
